Add Multiple Tags
You can add tags to connected devices by navigating to DeviceHub > Tags. To learn more about registers for specific devices, see the Industrial Systems Connection Guide.
Before You Begin
Before creating tags, make sure you have connected a device. Refer to Connect a Device.
Important
Refer to the following information on Free Tags and OPC UA Drivers:
- Certain device drivers do not have a list of register names in the Add Tag form. These are referred to as Free Tags.
- You must enter case-sensitive register names exactly how they are defined in the device.
- Devices do not display a Connected status until a tag with a correct register name is created. See Device Connectivity Issues for more information.
- For OPC UA, map the OPC server tags to the client. Enter the Register Name using this format where the semicolon is required: ns=1;s=tagname . For example: ns=2;s=Channel1.Device1.Tag1.
Add Multiple Tags
You can add multiple tags at once by downloading a CSV template file, filling out the file with tag details, and uploading the CSV file.
Important: When saving the CSV file, you must ensure that commas are used as column delimiters and not semicolons. If semicolons are used as column delimiters, you won't be able to upload the CSV file successfully. See Tag Upload through CSV Issues to learn more.
Step 1: Download a Sample CSV Template
You will need to download a template CSV file that has common device tag fields. You may need to update the file with additional fields based on the device tags you're adding.
To download a sample CSV template:
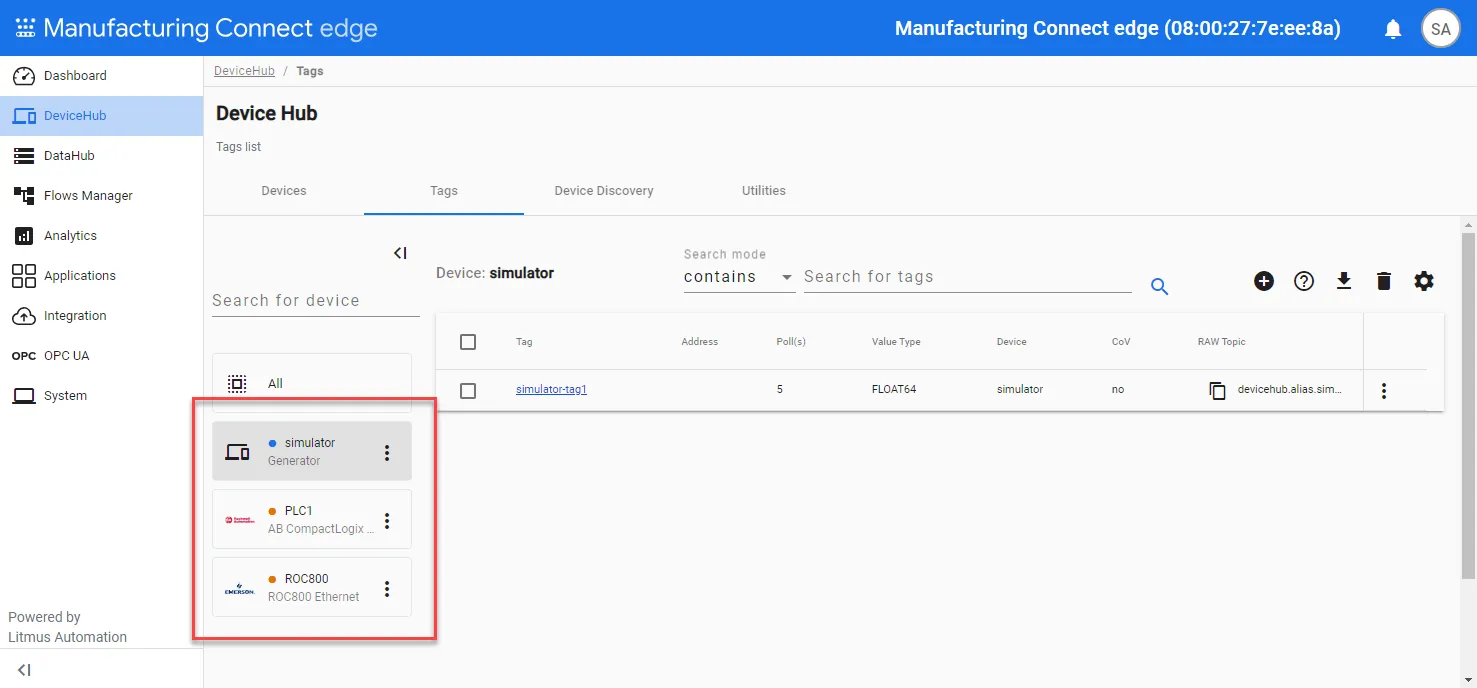
- Select the appropriate device.
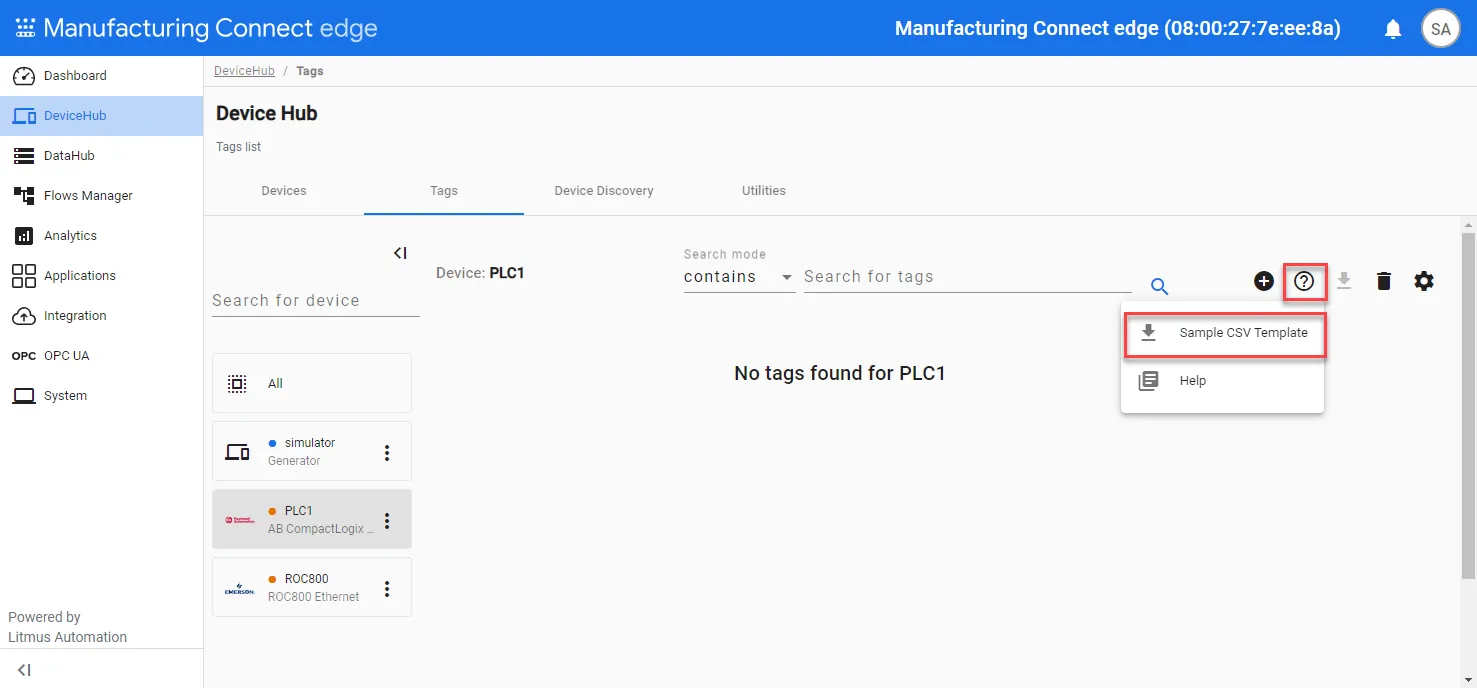
- Click the Help icon and select Sample CSV Template.
Step 2: Populate the CSV Template File
You can now populate the CSV template with the tags that will be added. A row/record for each tag must be populated with attribute values, as described below.
- Refer to the Industrial Systems Connection Guide and review the Tag Parameters section for your device. If tags for the device have additional fields that are not included in the template file, add them as required.
- The order of the attribute columns in the template file may be in any order.
Refer to the following sections for information on populating the CSV template file.
Example of a Tag CSV File
deviceId | deviceName | driverName | name | tagName | description | valueType | registerID | publishCov | tagFormula | metaData | pollingInterval |
|---|---|---|---|---|---|---|---|---|---|---|---|
A581B3E2-12CC-4A69-92C0-2C09DAFC5148 | Test_Device | AB CompactLogix Ethernet FreeTag | TestRegisterName | TestTagName | SampleDescription | bool | | TRUE | value+timestamp+100 | {"MetaDataKey1":"MetaDataValue1"} | 1 |
Tag Attribute Rules
- The deviceName is required to find the corresponding device. The deviceId can be omitted. If the deviceId is not included, a device name not found error displays, but the tags will still be successfully added.
- Attribute values are required unless noted as optional.
- If an optional value is null, it is ignored. This allows for the loading of register definitions for multiple device types from a single file.
- If the value is null and the device driver defines it as mandatory, the tag is not imported.
- If an optional value is present in the CSV file, but it is not supported by the device driver, it is treated as an error and the tag is not imported.
- Attribute columns in the CSV can be in any order.
Attribute Name | Data Type | Description | Required | Notes |
|---|---|---|---|---|
deviceId | string | ID of the device. You can get this value from the device tile in DeviceHub > Devices. | No | Get this value from the Copy icon next to the device ID in the device tile in DeviceHub > Devices. If a device identified by the deviceId is not found, deviceName is used. |
deviceName | string | The name you configure for the device. | Yes | |
driverName | string | Driver name is for validating optional attributes against registration.json. This type should directly correspond to the name of the driver package. | No | Get this value from the Copy icon next to the driver name in the device tile in DeviceHub > Devices. |
name | string | PLC register name or full PLC register address. | Yes | Depends on valueType This name is case sensitive. |
tagName | string | The name you configure for the tag. | Yes | |
description | string | The description you configure for the tag. | No | |
valueType | string | Type of the register value. | Yes | The list of available selection depends on the Register Table of the device. Examples: bit, word |
registerID | string | A unique register Id generated for this tag | No | This should be left blank as this value is generated when the tag is created. |
publishCoV | boolean | A flag that indicates whether the Only Publish on Change of Value setting is enabled. | No | If left bank, the value FALSE is set by default. |
tagFormula | string | A formula that will transform the tag payload value to a new final value. | No | This column will be empty if there is no formula entered. Available parameters for the formula are as follows:
Available math functions
Example formula: sin(value) + 1 For additional functions on tag values such as rounding and data conversions, you can use Analytics or the Flows Manager. |
metaData | string | A JSON-formatted string containing one or more Metadata key-value pairs | No | |
pollingInterval | float | Polling interval in seconds | No | How often the tag will poll the driver for a value. 0 means auto polling disabled. 1 means poll every 1 second. If left blank, a value of 1 is set. |
CSV Formatting and Escaping Rules
Because CSV format is not standardized, several different methods could be used for escaping special characters. And, depending on locality, a different value separator may be used. For example, in European countries, a semi-colon is widely used as a separator. The Manufacturing Connect Edge CSV specification adheres to the rules used by Microsoft Excel, as listed below:
- Field separators can be comma (,), semicolon (;), or tab (\t).
- Fields can have white spaces around them. This space is removed during processing.
- Fields can be escaped with double quotes (") or single quotes ('). Leading or trailing white spaces inside the quotes are preserved.
- Any separator characters within a quoted field is treated as part of the field value.
- Any quotation character in a field value must be escaped with a backslash (\) character.
- Fields are parsed based on their data type: string values are read "as is" and numeric values are parsed with a numeric parser.
- Empty fields are treated as null values.
Step 3: Upload Populated CSV File of Tags
Once the CSV template file is populated, you can upload it to add all tags that were added to the file.
To upload a populated CSV file:
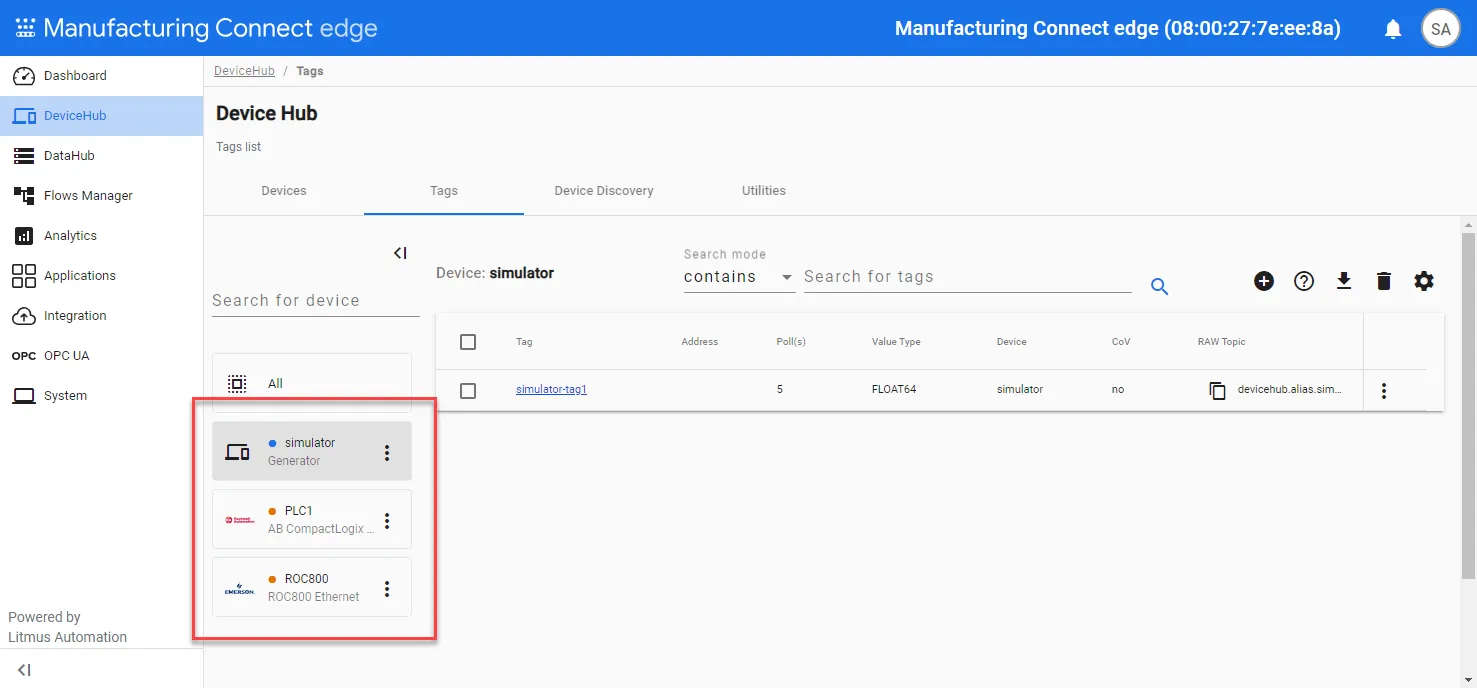
- Navigate to the Tags pane, and then select the appropriate device.
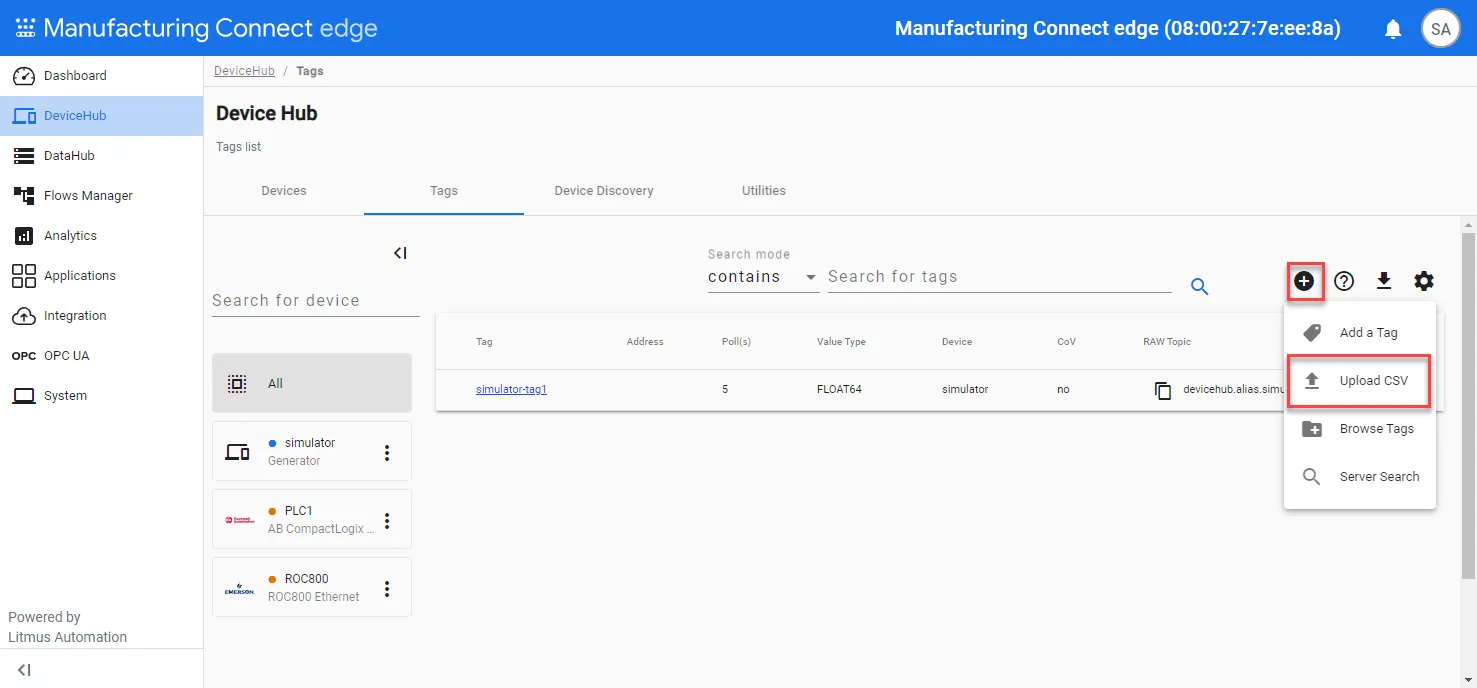
- Click the Add Tag icon and select Upload CSV.
- Click Select CSV.
- Select the file to upload and click Open.
- From the Upload Tags dialog box, click Upload. Upon a successful upload, the tags appear in the Tags pane. If the details in the CSV file do not match the expected configuration, error messages indicate the issues.